
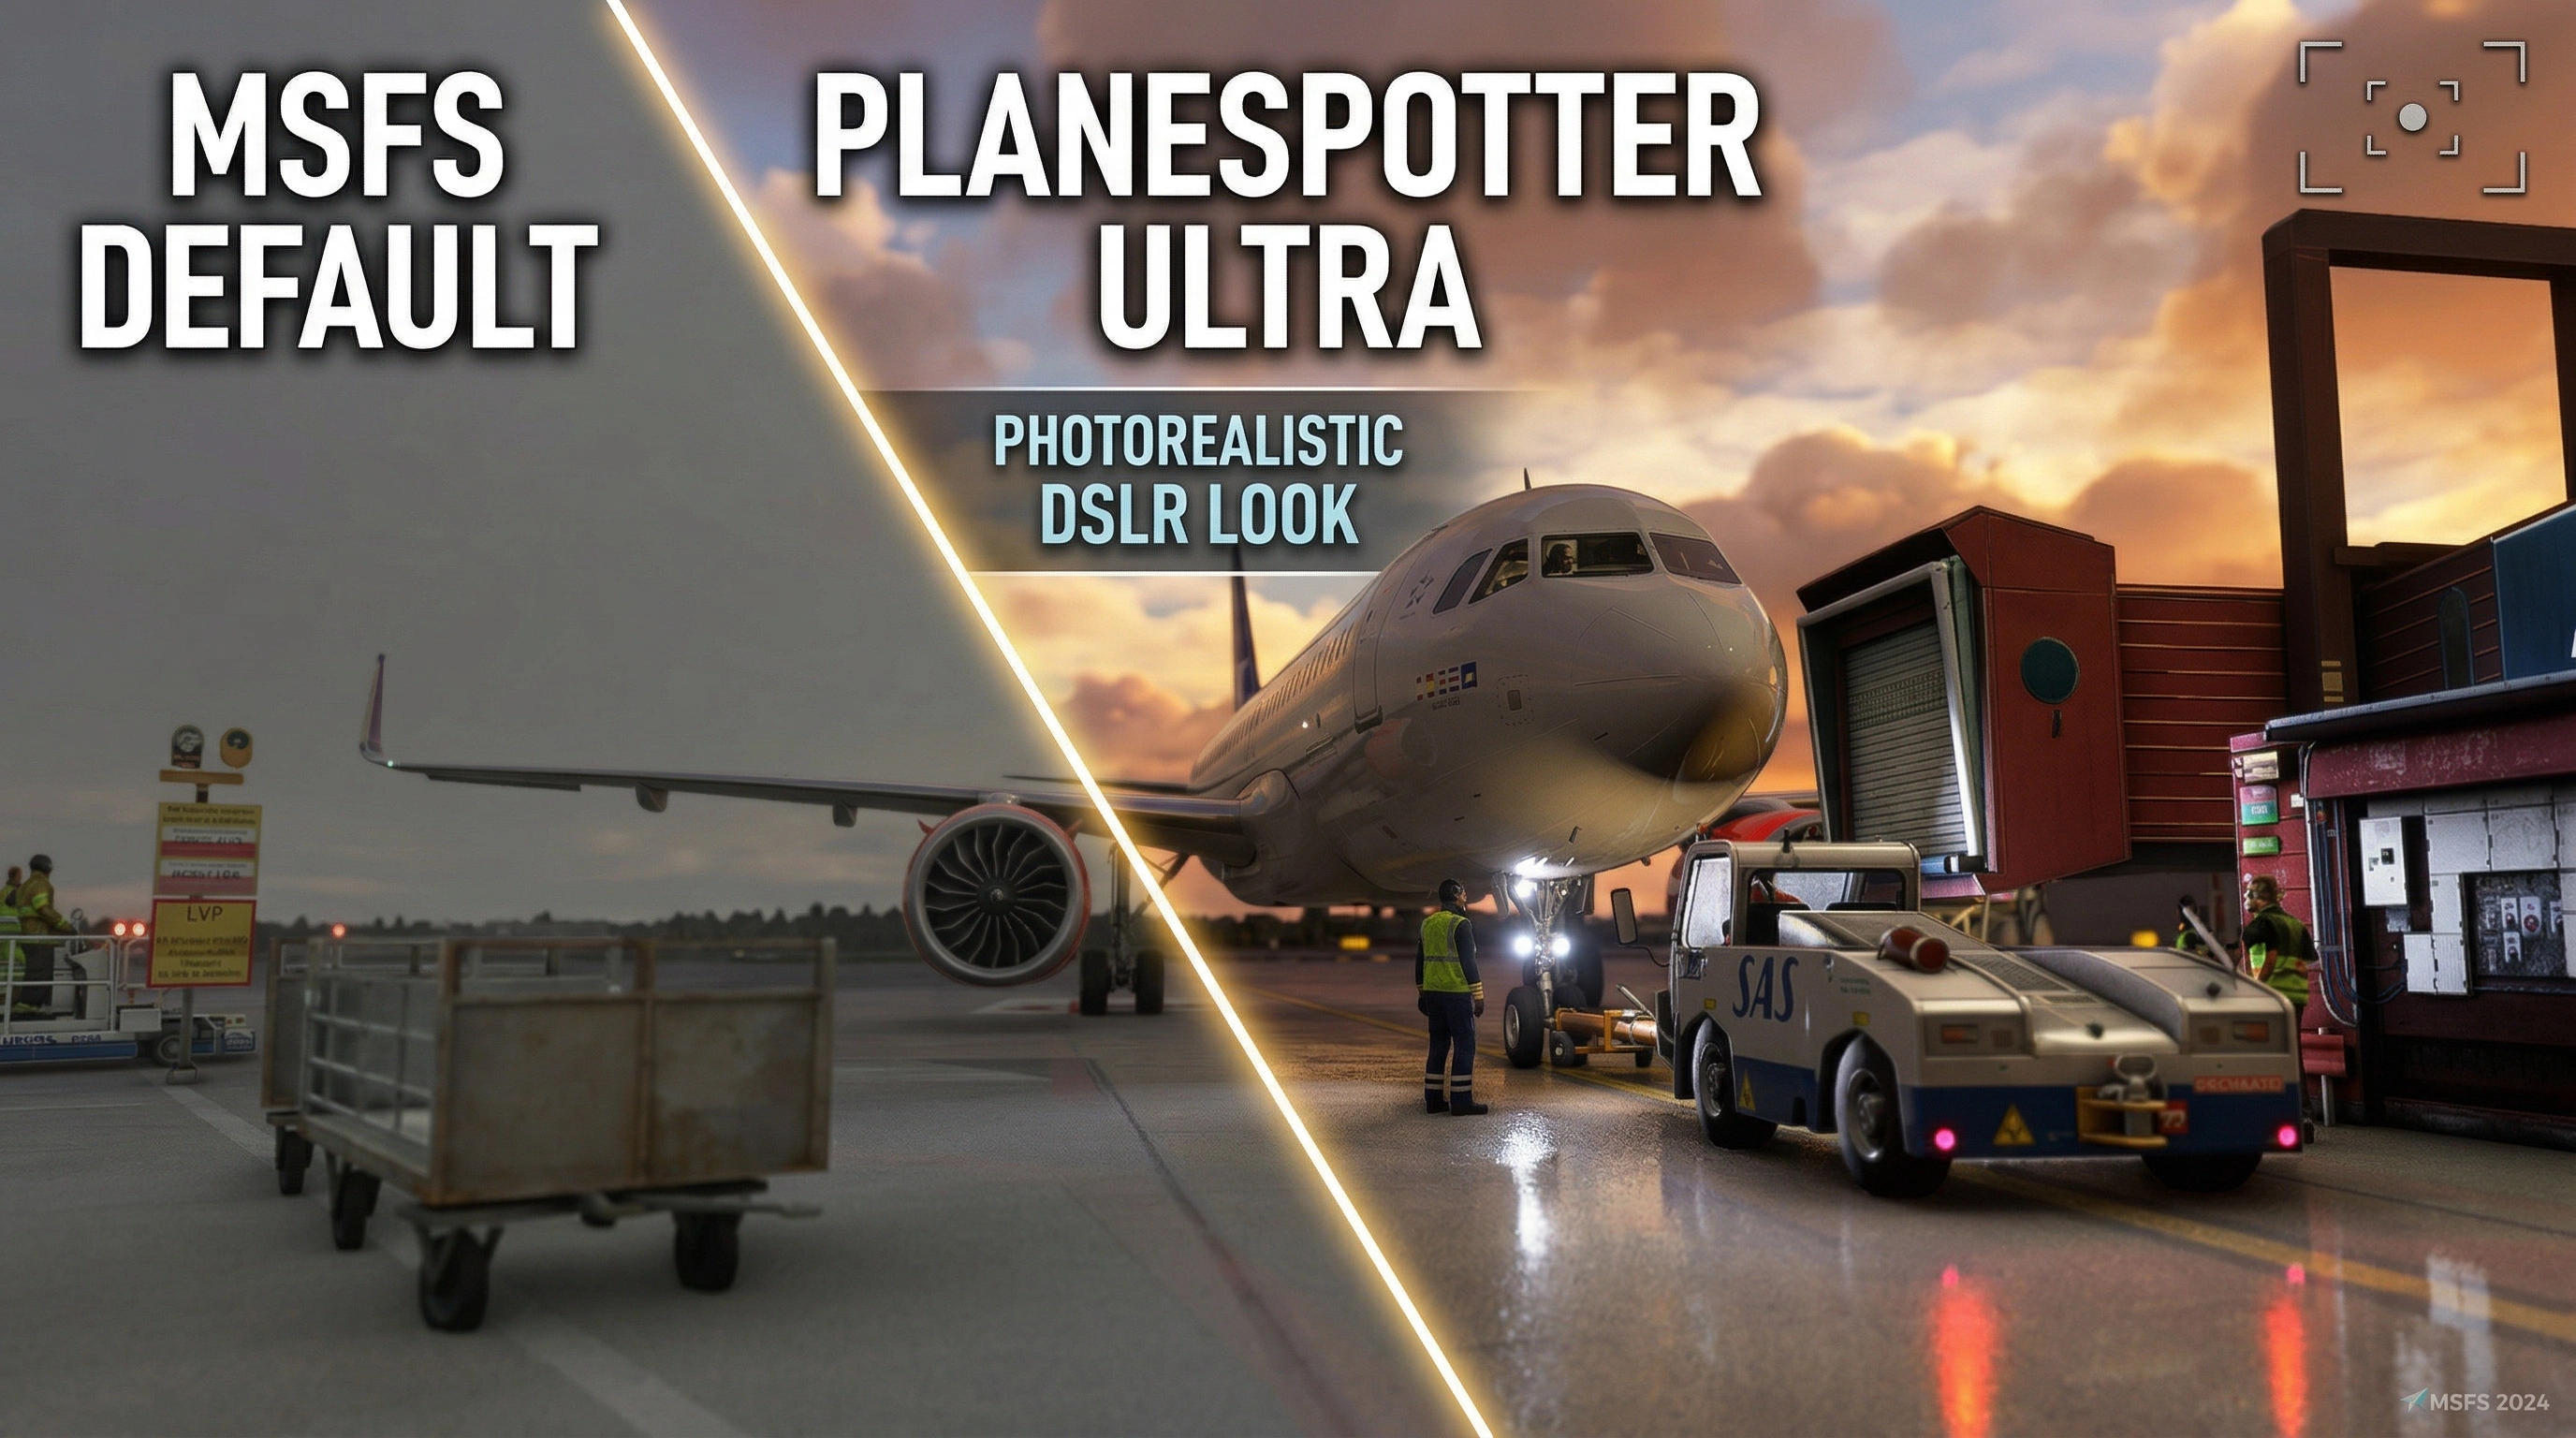
Description
This preset is designed to capture the authentic look of a real plane-spotter photograph (good DSLR + telephoto lens).
- Best Paired With: REX Atmos Core + Active Sky FS.
- The Philosophy: Relies on deep lighting, micro-contrast, and geometry-based effects rather than just simple color grading, delivering a highly realistic, photographic look without heavy Instagram-style filters..
- The Result: Great for external spotting shots, while enhancing cockpit views at the same time.
⚠️ This Preset is Unique - but still being worked on
Expect this Preset to currently be a matter of reguarly changes and updates - some of them being broken. Why would you still use it? Most of the other Presets do basic color grading / correction aka. "Fix the yellowish weirdness", but this Preset is actively improving the graphics with all power and features that this stack can offer.
As the Philosophy of this Preset States - the focus of the preset IS and will be to 1. being fully compatible with Rex Atmos Core and Active Sky and more importantly 2. going beyond color grading. Even though this Preset does some light & color correction in order to reach the best visual result in combination with Rex Atmos Core, i am actively exploring modern and unique Shader Technologies like (upcoming) Additional Raytracing Lighting, Bloom, Lens Flare and so on.
🛠️ 1. Installation Guide
- Download ReShade 6.7.3 (latest stable version recommended) from https://reshade.me and install it for
MicrosoftFlightSimulator2024.exe(choose DirectX 12). - Select "Copy preset file" during installation and point it to the included
.inifile (PlaneSpotter_UltraMax_MSFS2024_v1.3.ini).👉 Recommended: This ensures ReShade automatically downloads all required effects/shaders on the first launch.
- Download METEOR shaders (MartysMods / METEOR collection) from GitHub → click the green "Code" button → "Download ZIP".
- Download iMMERSE shaders (MartysMods / iMMERSE collection) from GitHub → click the green "Code" button → "Download ZIP".
- Extract & Copy: Extract the ZIPs and copy the contents of both the
ShadersandTexturesfolders into your game directory:%GAMEPATH%\reshade-shaders(usuallyC:\Games\Microsoft Flight Simulator 2024\reshade-shadersorC:\Program Files (x86)\Steam\steamapps\common\MSFS2024\reshade-shaders)- ⚠️ Important: Overwrite any existing files when prompted. This guarantees you have the latest iMMERSE and METEOR versions.
- Launch MSFS 2024. The ReShade overlay will appear (default key: Home). Load the preset via the dropdown menu.
💡 Recommended (but optional): In REX Atmos Core, use the presets beginning with ".Planespotter" for weather, atmosphere, and environment. They match the color balance perfectly. (The preset still looks very good without them).
⚙️ 2. Included Filters: Why & Performance
- MartysMods Launchpad + LocalLaplacian + Clarity
Why: Subtle micro-contrast and material definition.
- Cost: Very low impact.
- RadiantGI (PCGI)
Why: Gentle indirect bounce lighting for realistic shadows.
- Cost: Low samples = ~3–5% FPS hit.
- qUINT Lightroom + prod80 Selective Color + Shadows/Midtones
Why: Precise color tuning without destroying the REX Atmos Core mood.
- MartysMods NvidiaSharpen + MXAO
Why: Light edge enhancement + contact shadows.
- Cost: ⚠️ MXAO is the biggest performance user – see FAQ below.
- MartysMods FilmGrain + Vignette
Why: Classic analog film character + slight tele-lens corner falloff.
- Debanding + FakeHDR + Levels
Why: Clean, banding-free image + gentle exposure lift.
📊 Overall Performance Impact: On an RTX 4090 @ 1440p, expect a 7-14% FPS loss depending on weather/scenery.
❓ 3. Quick FAQ
Does it work in MSFS 2020?
Possibly, but depth buffer issues are more common in 2020. Some effects (GI, MXAO) may be weaker or might need to be disabled entirely.
Performance is too low on my system. What can I do?
- Fix 1: Disable
MartysMods_MXAO(this is the biggest FPS eater). - Fix 2: Remove one of the Sharpening Filters
- Fix 3: Decrease MartyMods Launchpad Settings
- Result: Most users regain near-native FPS after making these two changes.
Is this compatible with DLSS + AMD Sharpening?
Yes! The preset is explicitly tuned for this combo. Sharpening is kept conservative on purpose.
Enjoy flying! ✈️ Screenshots and feedback are very welcome – I am happy to update the preset based on community input.
Planespotter Ultra | Realism ReShade Preset | w/ Atmos Core and Active Sky compatibility
This ReShade preset authentically recreates the look of real-world planespotter photography using subtle adjustments for highly natural results. It is fully optimized to work alongside REX Atmos Core and Active Sky FS, while seamlessly supporting DLSS and AMD sharpening. The precise filters enhance micro-contrast, realistic lighting, and gentle color tuning, keeping both external shots and cockpit views perfectly clean. While the visual upgrade carries a noticeable performance impact even on high-end rigs, easy adjustments are included for mid-tier and low-end systems.

Avis des utilisateurs
2 avis
Historique des versions
* Active Sky must be in Passive Mode * - Reverted some changes back to v1.3 - Reintegrated RadientGI - Adapted Preset to Fit better for ReShade Presets
Connectez-vous pour participer à la discussion
Se connecterCommentaires(18)
6 months ago
6 months ago
6 months ago
4 months ago
6 months ago
6 months ago
6 months ago
4 months ago
7 months ago
7 months ago
7 months ago
If you install ReShade with the .ini File selected, it should be placed automatically and be select.
Otherwise you can put it pretty much anywhere and then select it in ReShade ( the hotkey to open ReShade Ingame is usually the Home / POS1 Button.
7 months ago
or do i put the contents into (C:\XboxGames\Microsoft Flight Simulator 2024\Content\reshade-shaders).
its confusing
7 months ago
You can find a tutorial on how to install the additional shaders on the page of MartysMods (the owner of METEOR and iMMERSE):
https://guides.martysmods.com/reshade/installing/reshademanualshaderinstall/
Also there will be a update soon, since currently the preset seems to be too bright at mid-day bright daylight.
If you are comfortable tweaking the values yourself, the Shader that leads for too bright daylight is Fake HDR, you can lower the second threshold (as i said: everyone has a slightly different simulator setup, so there is no ONE setting that is pretuned for all)
7 months ago
7 months ago
7 months ago
7 months ago
7 months ago